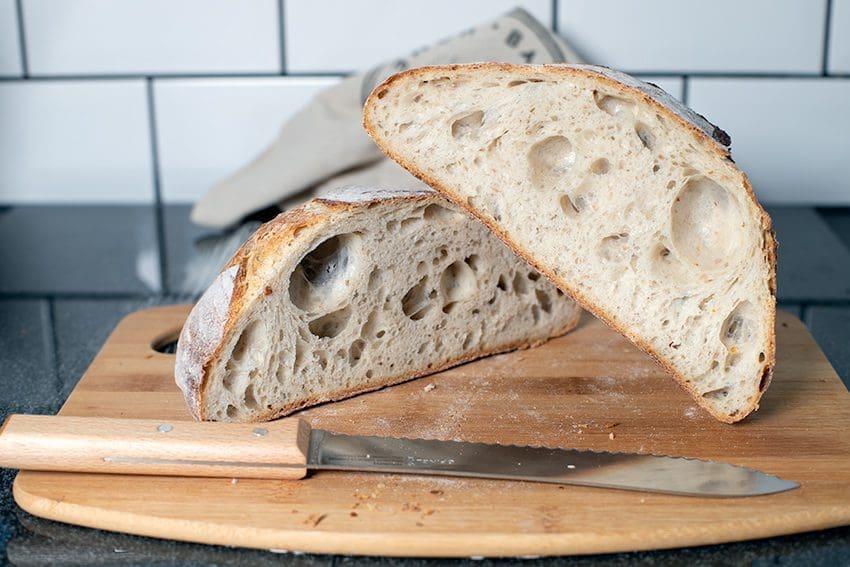
Last night, I took Sourdough loaf #85 out of the oven which not only marked just over a year since my Sourdough journey began, but also my 85th post since I started this blog in 2014. I thought it was high time to take the opportunity and document my experience with you. Of the 85 loaves of Sourdough bread which have emerged from my (very manual) production line, each and every time they turn out a little differently. As famously wrongly attributed to Albert Einstein:
“Insanity is doing the same thing over and over again and expecting different results.”
Sourdough baking (for me) is the polar opposite of this – I expect an identical output, but every loaf is uniquely different one way or another. I wouldn’t have it any other way.
I do not think there is any other recipe I have repeated in my life more than making Sourdough bread. To be completely honest, the first few weeks of being a very novice Sourdough baker were very much ‘by the book‘- with each and every step followed to the minute. It got to the point that the regime was slightly taking over my life (then again, I started this in lockdown and had nowhere to go!).
Spoiler alert… this is a ‘long read‘. I have tried to detail all the various stages in the process, but feel free to just jump to the recipe.
Please do not get me wrong- I love it. I really do. There are some fantastic resources online written and developed by much more experienced bakers. I have experimented with timings, combination of flours, tried to reduce the time it takes from beginning to end and critically make Sourdough baking adapt around my work schedule – not the other way round. What I did find was the sheer about of time to dedicate to each loaf was quite prohibitive- so the plan was to knock off a few minutes here, a few there and be able to produce the best loaf I could in the shortest time possible. Just to be clear- shorter in the context of Sourdough does not equate to ‘rapid‘- more to the point that I managed to make the process several hours shorter and noticed negligible difference. Equally, my primary intention is to produce really tasty Sourdough bread – and not to drive Instagram likes/inflate ego.
Before you can venture into the knocking out your very first Sourdough loaf, you will first need to have mastered the art of creating and maintaining your very own Sourdough Starter. As a prerequisite, I have created a separate post just for this: Sourdough Bread Part 1: The Starter. If you have found this post first… just as a heads-up, if you do not have a starter at hand, you will need to revisit in 7 days time with your very own home-produced wild yeast in hand ;o).
What is Sourdough Bread?
I was terrible at science at school (maths too if I think of it) and I would be the least qualified person to explain in accurate scientific detail all the intricacies of wild yeast and fermentation. One of the best descriptions I can find online is:
Sourdough bread is made by the fermentation of dough using naturally occurring lactobacilli and yeast. It uses biological leavening rather than using cultivated baker’s yeast. The lactic acid produced by the lactobacilli gives it a more sour taste and improved keeping qualities.
So, to all the science boffins out there, I hope that is clear. What I find truly fascinating is this method is thought to have started in 3700 BC, and baker’s yeast is a relatively recent leavening agent only having been around for 150 years. Sourdough baking is truly old school and produces a slow-fermented bread.
Whilst making the first few Sourdough loaves may appear really onerous and complicated, you will quickly be able to do this from memory. As soon as you have memorized the proportion of the ingredients, the temperatures required, and the timings, auto-pilot will start to take over. There are certainly numerous steps from beginning to end (that is something I cannot deny!), each one may take a minute here, a minute there. Most of the time, the leaven or the dough is ‘doing its thing’ without any effort on your part. You can just get on with the rest of your life, uninterrupted. Before jumping into the Sourdough bread recipe, I will do my best to explain each stage of the process… if anything, it should help to explain why Sourdough baking is a slow journey compared to the more traditional cultivated baker’s yeast counterparts. If for the sake of time, you’d like to experiment with these first, you may want to check out: Black Olive and Herb Bread ; Black Onion Seed and Sesame Bread ; Onion, Red Chilli, and Black Olive Bread (my favourite), and finally Sun-dried tomato bread with oregano and sea salt crust (the popular post on Love The Kitchen of all time!).
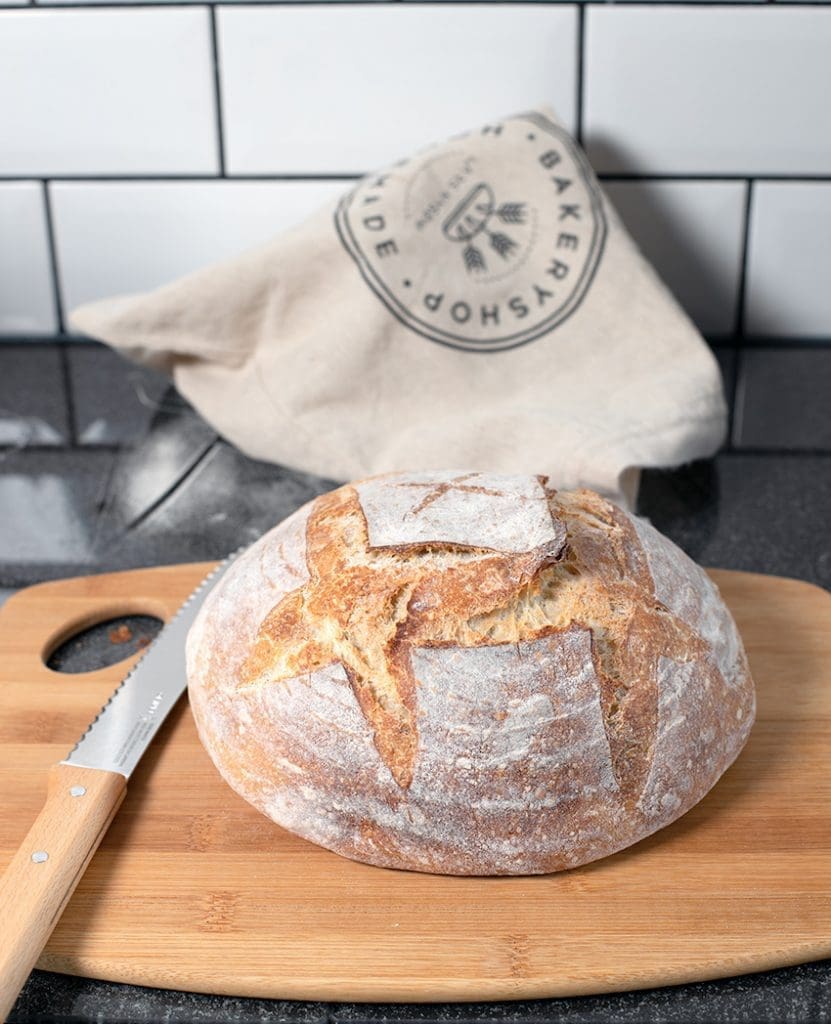
Temperature – the hardest factor to control
Even though different quality ingredients will have a very noticeable impact on the end result – flavour in particular – the one element which is hardest to regulate is temperature. Temperature of the water used for the starter. Temperature of the water used for the Leaven. Ambient temperature used for proofing. Get the temperature wrong at any stage, the end result may not be the ‘perfect crumb’ you had dreamed your bread ‘baby’ to be as it emerged from of the oven. My very worst experience resulted in a flatter ‘flying saucer-esque’ loaf. I was almost tempted to offer it up for a clay pigeon shoot’s next target. It tasted fine, but was almost complete devoid of all those holes! And to answer the question, ‘what is the perfect temperature for me?‘ – with so many environmental differences (altitude, humidity, ambient temperature) the answer is not going to be the same for everyone. Then, we have the differences of oven temperature. I have baked in quite a few over the years and there is significant variation across the board.
After a series of slight disappointments during the colder months, I bit the bullet and invested in a Brod and Taylor Bread Proofer. As my room temperature can fluctuate from 9 degrees Celsius up to 28 degrees Celsius, it was having a significant impact on the leaven and bread proofing stages. I have read that other bakers who face a similar challenge may use the heat of an oven’s halogen light to create a similar environment or the oven itself may have a dedicated proofing function. From my personal experience, I feel that the investment in the Proofer has paid off (my logic being, the more loaves I bake, the less the overall cost of the investment) – but think it is overpriced for what it is. I cannot deny though that this has not led to better and more consistent results.
Sourdough Bread Stage 1: The Leaven
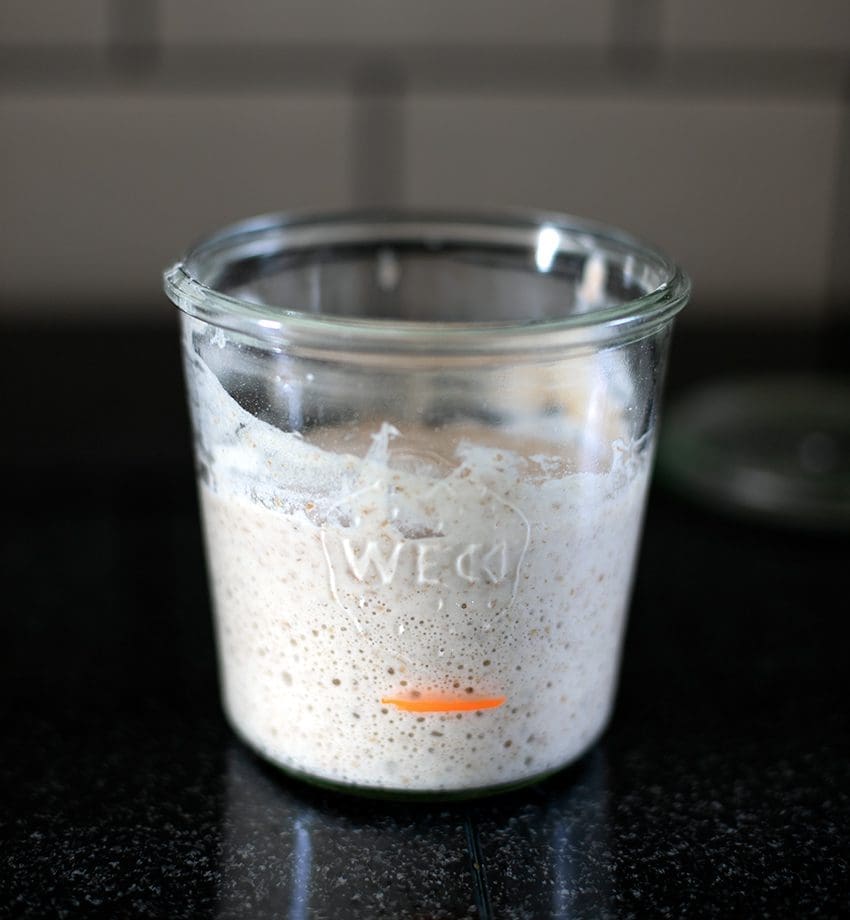
Undeniably, there are numerous (and repeated) steps from beginning to end of each every loaf. I wanted to briefly (or my version of it!) explain the key steps. The first, is the leaven. To avoid confusion (and believe me, I was confused at first) the starter (also referred to as mother dough) is the base from which to create the Leaven (Levain) which is an off-shoot of the original Sourdough starter. The starter will need to be fed and maintained (do not use it all up in your first loaf!), whereas the Leaven is, for want of a better term, ‘single use’ and destined for the oven. For simplicity (and the fact my memory is terrible, and I am dreadful at maths) I use the same proportions for the starter as I do the Leaven (50g starter, 50g water, 50g flour). This makes the feeding schedule much easier too.
Please be prepared… this stage takes time. My quickest… 4 hours. The slowest… overnight. There are a number of factors which impact the speed of fermentation. If you can, allow the Leaven to at least double, or triple. However, you can leave this too long. Once the height of the Leaven starts to deflate, your loaf will have less ‘oomph’ and will have a denser structure. Your airy ‘open-crumb’ dream loaf may also become a bit deflated as well.
Sourdough Bread Stage 2: Autolyse
Autolyse? In case like me, you thought there was something almost automated and fast during Sourdough bread making… think again. During this stage, the leaven is added to the remaining flour and water for 30 mins – 4 hours. I went with 60 mins, and have never looked back. During this stage, this flour absorbs the water making it fully hydrated and enzymes break down the starches and proteins. The benefit is that the dough becomes much easier to handle and stretchy, and will not tear. It also accelerates gluten development without the need for kneading. This makes the whole stretch and fold stage possible, and helps to produce the Open Crumb loaf which is taller and softer in structure. I have read several conflicting articles as to when the Leaven should be added to the Autolyse (some suggest it should be just flour and water, then the wild yeast added later) – I can only recommend what worked for me.
Before I forget, I wanted to briefly mention water. Water’s primary function is to allow the development of gluten in the bread dough. Surprisingly, the type of water you use (tap, filtered, bottled), hard or soft, plus how heavily treated (for example chlorine) can all make a difference. Personally, I have used Brita filtered water, then boil to 50 degrees Celsius (this is the easiest way for me to reach the 35 degrees Celsius water I typically aim for during the Autolyse process), and allow to cool down slightly. The bread guide have an excellent resource on water if interested. By no means am I saying you need to remortgage your property and import ‘artisan’ water from the island of Fiji… but just take into consideration the important role water quality has to play.
Sourdough Bread Stage 3: Add Salt
The Sourdough School have a great article regarding the merits of salt – the great flavour enhancer, and particularly adding it after the autolyse stage (I have seen some recipes shove everything in together). Critically, salt retards fermentation, hence why it is important to allow the yeast cultures to get a hold during the autolyse. Salt’s role is not just to add flavour, but also extends the shelf life as salt (which attracts water), prevents bread from going stale in a dry environment. Of course there are many resources waxing lyrical about which salt, I would recommend the best quality sea salt you can find. I use a French unrefined sea salt.
Sourdough Bread Stage 4: Stretch and Fold
Don’t worry, you do not have to dust off the yoga matt for this stage (even though I could certainly do with it!). What I have failed to mention that this recipe does not require any kneading. The stretch and fold technique improves the quality of the dough, and as per The Clever Carrot’s excellent website: “When done correctly, it will strengthen the gluten and gently incorporate air into the dough without kneading. The benefit is an increase in volume, a lofty high rise, and if you’re lucky a more open interior crumb.“
Wetting your fingers first is certainly recommended. Some recipes suggest repeated this stage 6-7 times, I have been happy with the results after 4. Initially, you will notice during the first fold set that the dough feels elastic and loose. As you progress through the stages, you will notice the dough transforms into a boule that was once quite dense into something plump and springy. After each stretch and fold set, I take the plastic dough scraper and add tension to the loaf by applying a little pressure to one side and ‘twisting’ the boule through 360 degrees.
Sourdough Bread Stage 5: Shaping the Boule
I have seen many deviations here in terms of how best to shape the boule, and opted for the quickest and cleanest option (in other words not layering a work top with flour, making even more of a mess, and engaging in a battle of dough origami). Before venturing ahead here, it is worth taking stock and consider the level of investment and commitment you are willing and able to take. As I do not have a steam oven (room or budget), very early on I took Dutch oven (cocotte) approach. The reason I mention this here, is that your choice will dictate the size and shape of your proofing basket. If you want to bake an oval loaf, you need an oval Dutch oven… with room for the ‘spring’. More on that later. I went with a 25cm round banneton proofing basket, to fit into a 28cm round cocotte.
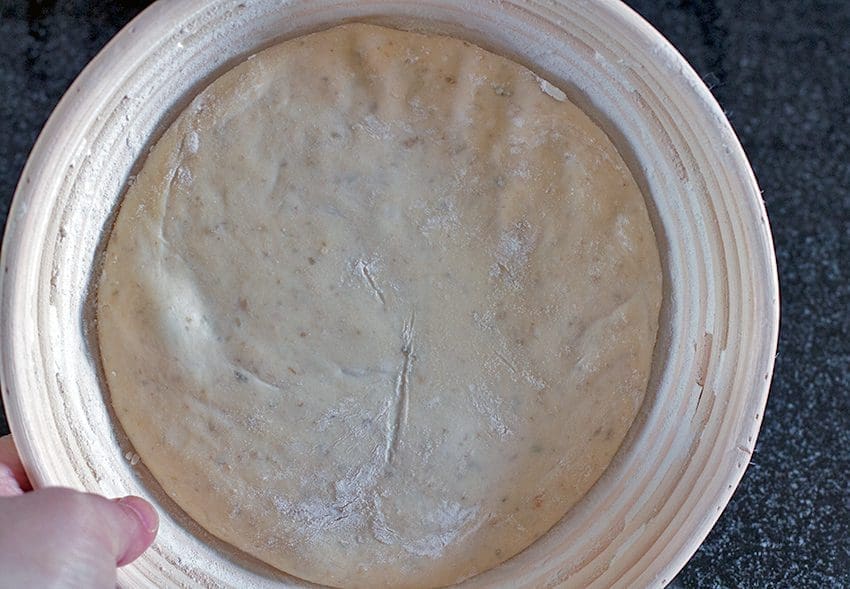
In order to shape the boule, I lightly dust the inside of the banneton with flour shaker. Then, using a dough scraper, create tension one more time, then lower the boule into the basket (so that the rounded top of the boule is now at the bottom of the basket). Sprinkle a thin layer of flour over the dough, and flatten the top and shape the edges by patting down with your fingers and palms. Cover with the cloth liner and refrigerate for 4-5 hours.
Sourdough Bread Stage 6: The Cold Proof
This is time for you to relax and do nothing. The cold proof is the second longest stage of all… the covered dough lives in the fridge for 4-5+ hours. Not only does this help to develop a thicker skin (it makes removal from the banneton basket far easier), it improves the flavour.
Other advantages of cold proofing are that the boule will hold its shape significantly longer than warm dough, which goes floppy very quickly and is prone to losing its shape. Finally, scoring the skin with a sharp lame or razor will result in a cleaner cut and less likely to pull/tear than its warm dough counterpart.
If I am attempting to make the whole Sourdough loaf within a one-day schedule, I will cold proof the loaf for 4-5 hours. Alternatively, if I choose the more relaxed two-day schedule, the loaf will remain in the fridge considerable longer.
Sourdough Bread Stage 7: Scoring the Dough
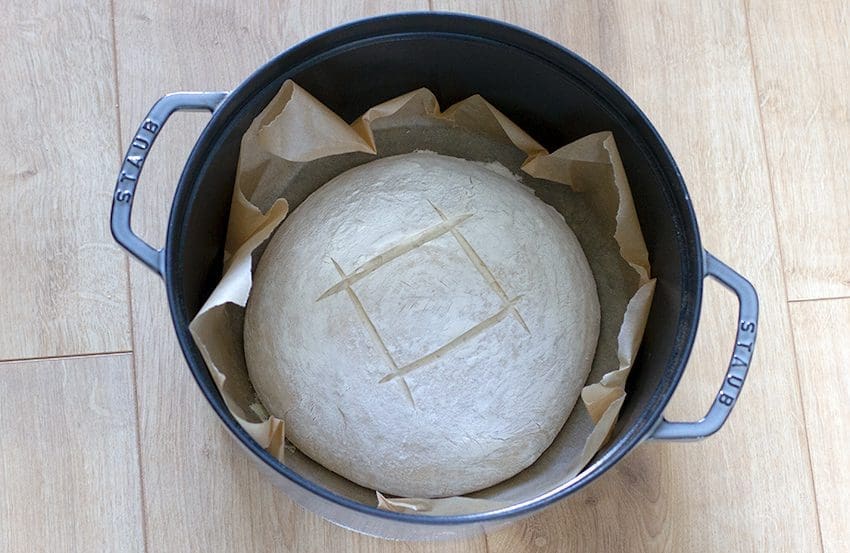
Once the Sourdough boule has been tipped out onto a sheet of greaseproof paper, you can now score (or slash) the dough with a very sharp blade. A score is a shallow cut make quickly with the least amount of hesitation possible. After practice, you’ll get used to it for sure. I originally used a double-edge razor blade, but more recently moved to a lame. It is really a personal choice, all I can say is.. be careful. The main purpose is to allow gases to escape during the first ‘oven spring’ and help try and control the direction will expand. However, each loaf you make will rise differently. The second reason for scoring.. aesthetic artisan bread art! My artistic gifts are about as bad as my science skills, and I dabble and experiment. There are many resources online which are far better served than me to learn from the masters.
Sourdough Bread Stage 8: The Bake
The journey is nearly over! If you research this stage, you might find some conflicting opinion between whether you should pre-heat the oven or not. I have only ever tried the cold-oven method, for the reason that Staub, the manufacture of my Dutch oven warn that the enamel coating could crack if rapidly subjected to high heat from cold. If you have found an alternative brand, or pure cast iron which is more robust and has no guidance regarding shock or sudden heat, feel free to put it in a hot pre-heated oven.
In my situation, I cover the Dutch oven with its lid, ramp up the oven to 230 degrees Celsius then bake the Sourdough for ~ 35 minutes. This is the first ‘oven spring’ where the loaf will rise in height and could gain a further 30% in volume. The outer skin develops a crust and hardens, and can only do so if there is moisture in the oven. The reason for using a lidded Dutch oven is that it traps both heat and moisture – both essential to help create the ‘spring’.
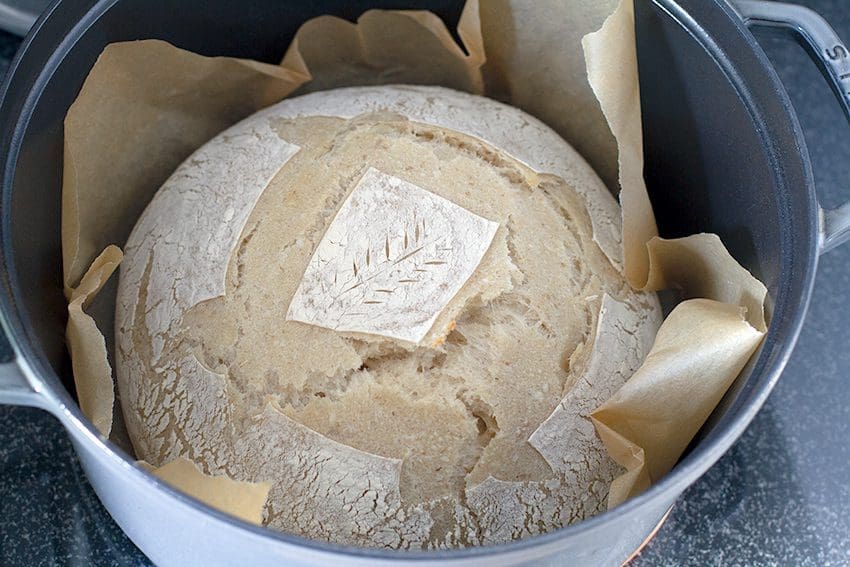
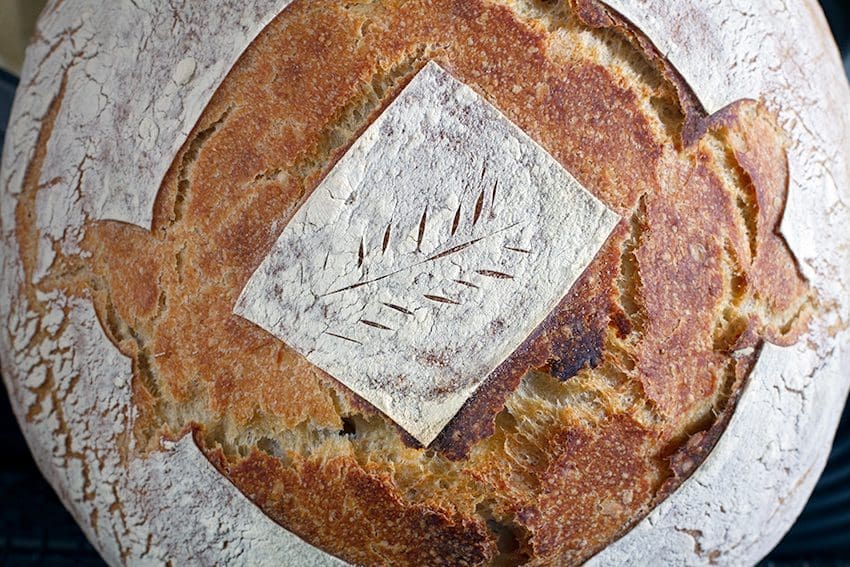
After the first bake, I remove the lid, drop the temperature to 200 degrees Celsius, and bake for a further 30 mins. The loaf is transferred onto a wire rack for cooling for a couple of hours, and then you are left with the next challenge… what are you going to eat it with?
If you have got this far, thank you for reading. I have tried my best to synthesize as much as I can into a single post. As the saying goes, the ‘devil is in the detail‘ – I really wanted to both be encouraging, and help you avoid some of my earlier mistakes when I started a year ago. And really, if your first loaf did not come out as you were hoping, try and try again. I am sure you will crack it. And from my perspective, even if it comes out less ‘pleasing on the eye‘ than I had hoped, it always tastes damn good, regardless.
I would welcome any comments below, and happy to correct any omissions.
The Sourdough Bread Recipe
Finally, we are there! Please find below the recipe itself for making home-made Sourdough bread from scratch. Please note: the timings assume that you are following the one-day schedule. And please don’t worry if you take a few minutes extra between stretch and folds, for example. I am sure the end result will be great.
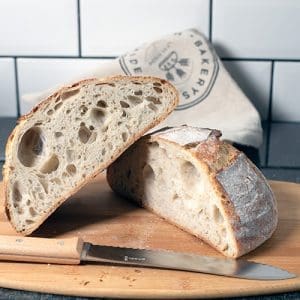
Sourdough Bread
Equipment
- Glass preserving jar with lid (I use Weck 580ml)
- Digital measurement scales
- Thermometer
- 25cm banneton proving basket with cloth liner
- Plastic dough scraper
- bread lame, safety razor blade, or very sharp knife
- 28cm cast iron cocotte (dutch oven) with lid (I use Staub)
- Large mixing bowl
- pipette
Ingredients
Sourdough Leaven
- 50 g Sourdough Starter
- 50 g Warm filtered water ~35 degrees Celsius
- 50 g Unbleached white bread flour
Sourdough Bread
- 150 g Bubbling, active Sourdough Leaven
- 300 g Warm filtered water ~35 degrees Celsius
- 500 g Unbleached white bread flour
- 10 g fine sea salt
Instructions
Step 1: Make the Sourdough Leaven
- Place a clean mason jar on a digital scale, and zero it. Add 50g of your starter, 50g unbleached white bread flour, and 50g warm filtered water (~ 35-40C) and mix thoroughly with a fork. You may want to mark the starter's height with an elastic band, tape, or a dry board marker (I actually use a liquid chalk pen)
- Cover loosely with a lid, and leave in a warm place (ideally 20-29C)* to ferment for approximately 4-6 hours, or until the leaven has doubled in size (or more) and reached its peak. If you leave it too long, your starter will deflate.
- The leaven should now be very active with lots of bubbles and ready for baking. Another option to check if the leave is active enough, you can try the float test **. Drop a teaspoon of active starter into a glass of water, if it remains on the surface (and not sink) it should be active enough.
Step:2 Make the Sourdough Bread
- Place your large mixing bowl on an electronic scale, and weigh 300g of warm water (~35-38C)
- Using a silicone spatula, scoop out all the leaven and pour into the water. Using a bell whisk, thorough combine the water and leaven.
- Pour in 500g strong unbleached break flour, and mix thoroughly with a silicone spatula. Then, transfer to a plastic dough scraper, and scrape all the dough from the sides of the bowl and combine into a scraggy ball of dough. Cover with a warm damp tea towel and leave to autolyse at room temperature for an hour.
- Weigh 15g warm water, and 10g fine sea salt and stir thoroughly. If you over weigh 15g water (easily done), use a pipette to extract the excess. Using the dough scraper, detach the dough from the base of the bowl and turn to form into a round.
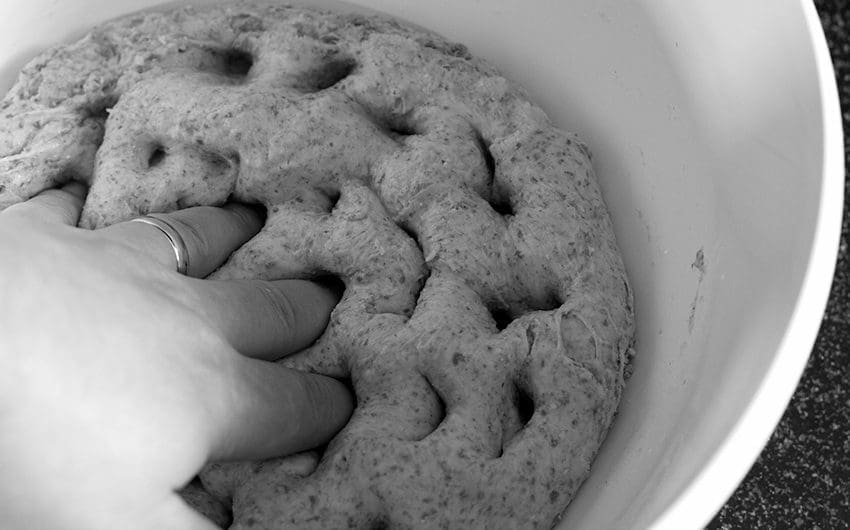
- Spoon half the saline mixture over the top of the dough, then poke several times with your fingers (as if making a Focaccia). Turn the dough over, spoon over the rest of the saline solution, and poke again several times.
- Using the dough scraper, form the dough into a ball and create tension in its surface. Cover with a damp tea towel and leave at room temperature. Wait 10 minutes.
- Stretch and Fold #1: With the tips of your fingers (moistened with water), lift the dough from the corner opposite you, stretch, and fold over. Rotate the bowl 90 degrees and repeat the stretch and fold three more times. Use the dough scraper to create tension and the boule shape, cover with tea towel and leave for 30 minutes.
- Stretch and Fold #2: With moistened fingertips, lift the dough from the corner opposite you, stretch, and fold over. Rotate the bowl 90 degrees and repeat the stretch and fold three more times. Use the dough scraper to create tension and the boule shape, cover with tea towel and leave for 30 minutes.
- Stretch and Fold #3: With moistened fingertips, lift the dough from the corner opposite you, stretch, and fold over. Rotate the bowl 90 degrees and repeat the stretch and fold three more times. Use the dough scraper to create tension and the boule shape, cover with tea towel and leave for 30 minutes.
- Stretch and Fold #4: With moistened fingertips, lift the dough from the corner opposite you, stretch, and fold over. Rotate the bowl 90 degrees and repeat the stretch and fold three more times. Use the dough scraper to create tension and the boule shape, cover with tea towel and leave for 15 minutes.
- Gently flour the inside of the banneton proving basket. Create tension one last time with the dough scraper, then scoop up the entire dough boule and turn it into the floured banneton basket (so that the top is now at the bottom of the basket). Sprinkle a thin layer of flour over the dough, and flatten the top and shape the edges by patting down with your fingers and palms. Cover with the cloth liner and refrigerate for 4-5 hours.
Bake the Sourdough loaf
- Place a sheet of greaseproof paper onto a flat surface. Carefully turn out the sourdough boule so that the rounded top is facing you. Using a pastry brush, dust off the excess flour and brush away.
- Very carefully using a lame, safety razor blade, or sharp knife, score the surface of the boule. You may want to start with a large '#' shape, but other options are available.
- Pick up the greaseproof paper and carefully lower the boule into the centre of the cast iron cocotte. Make sure that the paper is not touching the sides of the boule. Cover with the lid, place in oven and set to 230-240 degrees Celsius. Bake for 35 minutes.
- Remove lid, lower oven temperature to 200 degrees Celsius, and bake for a further 30 minutes.
- Remove cocotte from oven, lift loaf and transfer to a wire cooling rack. Allow to cool for 2 hours.
Notes
Sourdough Baking Schedules
As everyone’s routine is different, I have proposed two schedules to try and accommodate your busy lives. Whilst there are many individual steps (and I fully understand how overwhelming they can appear), it is the case of a minute here, 5 minutes there – and then just let time take over! The stopwatch feature on my phone has never been used so often to prompt me to move onto the next step.
One-Day Sourdough Schedule
| Time | Stage | Stage Duration |
| 07:25 | Make leaven | 5 mins |
| 07:30 | Place leaven is warm place with lid placed loosely on top | 6 hours |
| 13:30 | Combine Leaven with warm water and flour and mix. Leave to autolyse. | 1 hour |
| 14:30 | add salt and water, and poke then cover. | 10 mins |
| 14:40 | Stretch and fold #1 | 30 mins |
| 15:10 | Stretch and fold #2 | 30 mins |
| 15:40 | Stretch and fold #3 | 30 mins |
| 16:10 | Stretch and fold #4 | 30 mins |
| 16:25 | Shape the dough, add to floured banneton basket and cover with cloth liner | 15 mins |
| 16:50 | Place in fridge to cold proof | 5 hours |
| 21:30 | Remove from fridge, place in cocotte, score, and cover with lip | 5 mins |
| 21:35 | Bake in oven for 35 mins at 240C | 35 mins |
| 22:05 | Remove lid, reduce oven to 200C, and bake for further 30 mins | 30 mins |
| 22:35 | Remove from oven, place on wire rack to cool. | 2 hours |
Two-day Sourdough Schedule
| Time | Stage | Stage Duration |
| — Day 1 — | ||
| 11:25 | Make leaven | 5 mins |
| 11:30 | Place leaven is warm place with lid placed loosely on top | 6 hours |
| 17:30 | Combine Leaven with warm water and flour and mix. Leave to autolyse. | 1 hour |
| 18:30 | add salt and water, and poke then cover. | 10 mins |
| 18:40 | Stretch and fold #1 | 30 mins |
| 19:10 | Stretch and fold #2 | 30 mins |
| 19:40 | Stretch and fold #3 | 30 mins |
| 20:10 | Stretch and fold #4 | 30 mins |
| 20:25 | Shape the dough, add to floured banneton basket and cover with cloth liner | 15 mins |
| 20:50 | Place in fridge to cold proof | 10 hours 40 mins |
| — Day 2 — | ||
| 07:30 | Remove from fridge, place in cocotte, score, and cover with lip | 5 mins |
| 07:35 | Bake in oven for 35 mins at 240C | 35 mins |
| 08:05 | Remove lid, reduce oven to 200C, and bake for further 30 mins | 30 mins |
| 08:35 | Remove from oven, place on wire rack to cool. | 2 hours |
Please note: I have added links to a few products on Amazon which have helped me enormously with my Sourdough journey. As a disclaimer, should you make a purchase I may get a small commission (to date in 5 years, I have made £0.00, so I hope I have not been over promotional!).

This really is a labour of love thanks for sharing, Up until now, I have always been proofing the bread for a couple of hours after taking it out of fridge…. not sure why! Food for thought, will play more and take some risks!
Hey, quite the masterclass on sourdough. I gave up previously from another blog I had read..not sure what went wrong but it was more like a flying saucer than open crumb loaf being strived for.Never found out why
Quick point: you talk about water quality, salt, but no mention of flour..surely the type and quality matters too.
Hi Melanie, you are so right! I completely overlooked this topic. My personal choice..good quality unbleached bread flour. I have tried a few, and keep returning to a UK Flour Mill called Marriages. For convenience, I bulk buy 16kg sacks at a time.. This alone is enough for 30+ loaves.
I think you have given me an idea to flesh out this topic in a separate post. Thanks.
Thank you, thank you! for taking the time to write this post and share your experience. It will save many headaches to many people.
I was lucky you shared this with me weeks ago and since then my loafs of sourdough bread are AMAZING, because I followed your guidance.
Hey Alicia, my absolute pleasure.
Incidentally I went too experimental yesterday. Tried a leaven with 50% rye, did it at much cooler temp then recommended, then blended the flour too much in the favour the outcome.
The outcome.. something denser and flatter than hoped but still..it is all good in the taste department. Far from deterred, I will continue to play and experiment….?
The Brod & Taylor proofer is a game changer for me. Don’t forget it also operates as a slow cooker with the added advantage of using any old pot you have. The ability to fold is down to 2 x laptop size means it doesn’t dominate the kitchen like a microwave.
Hi Martin, many thanks for your comment. I must have used mine 200+ times. I never considered using it as a slow cooker though..what impresses me the most when proofing the Levain are the consisten results all year round.